

Hello! Tracy here with another Amazing Casting Products inspiration post! Recently I have been inspired by community clean-up projects and how to upcycle plastic. Having already seen many beautiful upcycled plastic soda bottle jellyfish sculptures, I wanted to try a version with water bottles.
My first learning curve was finding out using a candle isn't always the best; it can cause the plastic to light on fire, uneven melting and of course make the project not very child friendly.
I found out using a heat gun was a better way to control the melting of the plastic and older children can join in with the crafting with adult supervision. However even with using a heat gun the plastic would curl, fold over and make all kinds of lumpy and rather un-jellyfish shapes.
I realized when using a heat gun I needed to create a base for the plastic bottles to mold to while being shaped. This is where Amazing Mold Putty came to my rescue!

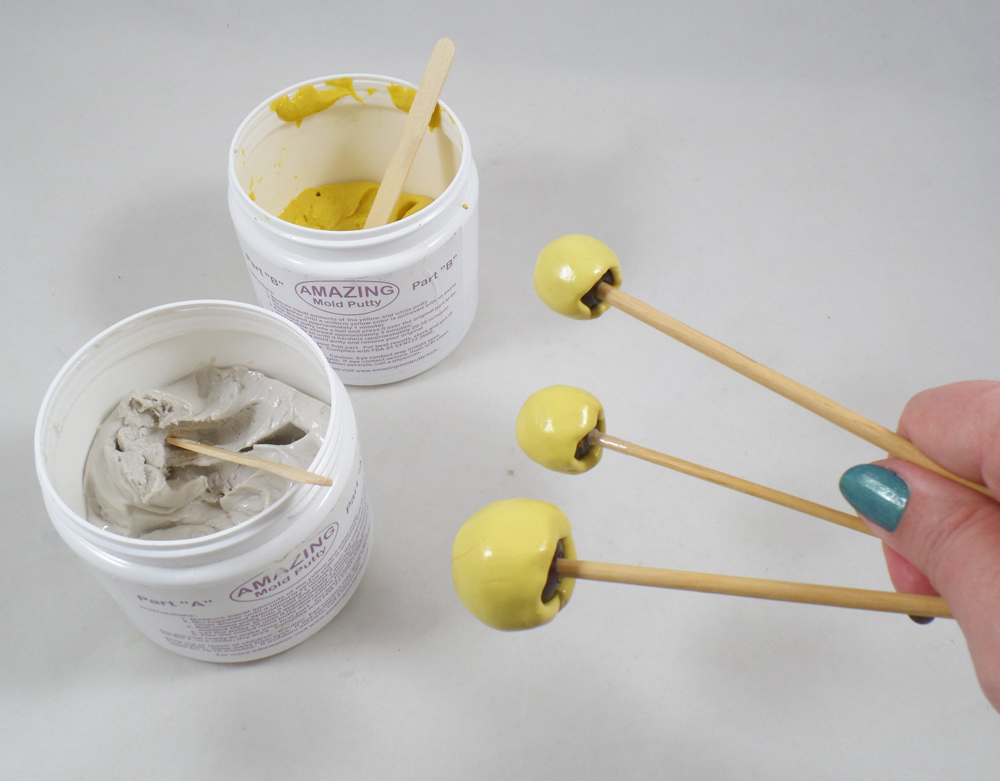
I started off with 3 over-sized glass beads, small, medium and large. I pushed the beads on wood dowels cut to 12 inches.

While I could heat and mold the plastic water bottles over the beads I would risk the plastic shrinking to the glass so tight it couldn't be removed and the glass beads overheating from the heatgun. I needed to make a heat tolerant base that was flexible and would retain the round shape. I mixed up some Amazing Mold Putty and applied a small amount to each bead, covering the majority of the bead.

Once cured I placed each Amazing Mold Putty coated bead into a heat tolerant cup and filled it with glass pebbles. The cup with pebbles would act as a temporary base, to stick the now finished round molds in, that would not shift while the plastic bottles were being heated.

With a sharp pair of scissors I cut off the top nozzle of each bottle, and then cut each bottle bottom off; they will become the bell top of the jellyfish and the sides, cut like fringe, would become the tentacles. I tinted the plastic with alcohol inks but there are many different pigments and paints you can use to tint the plastic.

Using a pair of tweezers I placed one of the plastic bottle bottoms on the largest of the round molds and heated it with a heat gun. I was careful to rotate the plastic to make sure all of the plastic was heated and would shrink down into jellyfish bell shape.

Using a pair of tweezers I placed one of the plastic bottle sides on the medium size round mold and heated it with a heat gun. I heated the top first, shrinking the plastic and making it snug around the Amazing Mold Putty. I then grasped each cut piece of plastic with the tweezers, twisting to create tentacles.

I then placed both the tentacle and bell shaped plastic pieces together on the small round mold and heated them one final time to create the final shape.

The bell and tentacle pieces can be attached together with glue or eye-pins, as I did to create tropical party ornaments. If you drilled a large enough hole through the bell of each jellyfish, then thread on the tentacles, you can make them into string light covers!
I realized when using a heat gun I needed to create a base for the plastic bottles to mold to while being shaped. This is where Amazing Mold Putty came to my rescue!

I started off with 3 over-sized glass beads, small, medium and large. I pushed the beads on wood dowels cut to 12 inches.
While I could heat and mold the plastic water bottles over the beads I would risk the plastic shrinking to the glass so tight it couldn't be removed and the glass beads overheating from the heatgun. I needed to make a heat tolerant base that was flexible and would retain the round shape. I mixed up some Amazing Mold Putty and applied a small amount to each bead, covering the majority of the bead.

Once cured I placed each Amazing Mold Putty coated bead into a heat tolerant cup and filled it with glass pebbles. The cup with pebbles would act as a temporary base, to stick the now finished round molds in, that would not shift while the plastic bottles were being heated.

With a sharp pair of scissors I cut off the top nozzle of each bottle, and then cut each bottle bottom off; they will become the bell top of the jellyfish and the sides, cut like fringe, would become the tentacles. I tinted the plastic with alcohol inks but there are many different pigments and paints you can use to tint the plastic.
*Depending on the shape of the plastic bottles you might find you will need to cut them in a different manner; there is no right or wrong way, it is all about having fun!

Using a pair of tweezers I placed one of the plastic bottle bottoms on the largest of the round molds and heated it with a heat gun. I was careful to rotate the plastic to make sure all of the plastic was heated and would shrink down into jellyfish bell shape.

Using a pair of tweezers I placed one of the plastic bottle sides on the medium size round mold and heated it with a heat gun. I heated the top first, shrinking the plastic and making it snug around the Amazing Mold Putty. I then grasped each cut piece of plastic with the tweezers, twisting to create tentacles.

I then placed both the tentacle and bell shaped plastic pieces together on the small round mold and heated them one final time to create the final shape.

The bell and tentacle pieces can be attached together with glue or eye-pins, as I did to create tropical party ornaments. If you drilled a large enough hole through the bell of each jellyfish, then thread on the tentacles, you can make them into string light covers!
What AMAZING arts and crafts can you create?
Please share them on the user GALLERY on the Amazing Crafting Products Website!
Visit my blog Art Resurrected for more craft tutorials!
Until next time, safe travels! ~ Tracy
• • • • • • • • • • • • • • • • •
Don't forget to subscribe to our blog on the right side bar:
Twitter at AmazingCasting | Facebook at AmazingMoldPutty | YouTube at AmazingMoldPutty

No comments:
Post a Comment