

Hello, gang!! Remember the vintage books I shared with you last year? I finally had the chance to mold one of them, and create a totally unique and pretty-cool-if-I-do-say-so-myself-and-I-do-say-so-myself, Art Journal for this coming year at The Precinct (AKA A Year in the Life of An Art Journal).
To create one of your OWN journals...
Here's what you'll need:
- A really cool, old book that you don't mind the possibility of ruining. (I'll share more about that later)
- A shallow tray of some sort for casting in.
- Amazing Mold Rubber
- Amazing Clear Cast Resin
- Blue Alumilite Dye
- Krylon Matte Finish Artist' Spray Paint
- Acrylic Paints
- All the bits and bobbles, ephemera, etc. that you want to decorate your cover with. (I'll leave that up to you)
Let's get started!!
Click any of the images here to view them larger.
This art journal began with the idea I had to use Amazing Mold Rubber to cast a mold of some of my favorite vintage books with cool textures and embossing on them. For this project, I chose my Women's Institute Library of Cookery book from my bunch. It's 5 and 1/2 inches by 9 inches, and a nice middle of the road size for an art journal.
To get the book ready for casting, I took the cover apart, keeping the front and back. I sealed them using matte finish clear spray paint.

You can see a bit of the embossing on the cover in the photo above. This step alone "wrecked" my book cover, because the paint dried slightly opaque. When I say to use a book you don't mind losing the original of, I really mean it.
Once the paint was dry, I mixed and poured Amazing Mold Rubber into a glass tray I had purchased for this job. GO HERE for video instructions on mixing and pouring Amazing Mold Rubber. In hind sight, I would have used a mold release on both my book cover AND my tray, because I ended up nearly losing the entire project when the mold rubber took too well to both pieces. I don't know why I didn't do that in the first place!! Alumilite has a Mold Release, and I have it in my stash! You can also use Vaseline as a release agent. I would have used it on my tray to help the mold rubber release from it. Lay your cover face down in the mold rubber, and press it in. I didn't use an anchor for my pieces, because items will naturally float to the surface of Amazing Mold Rubber. I kept an eye on my cover and kept pressing the pieces down every once in a while to ensure they were in the rubber deep enough. Once the Amazing Mold Rubber started to cure and set up, I didn't have to press them in any more.

It took some considerable doing, once the rubber set, to pull my book cover out of the mold. This is why I mention using a book you don't mind chancing getting ruined. As I mentioned above, I also had a tough time getting the Amazing Mold Rubber to release from the glass. Again, something I would fix with a release agent in the future. For this project, I managed to get things out by cutting the mold in half, and using a LOT of elbow grease!! Be careful, though! I did rip my mold a bit. Thankfully, when you press the mold back into it's tray to pour, seams like that seal back up for the pour.
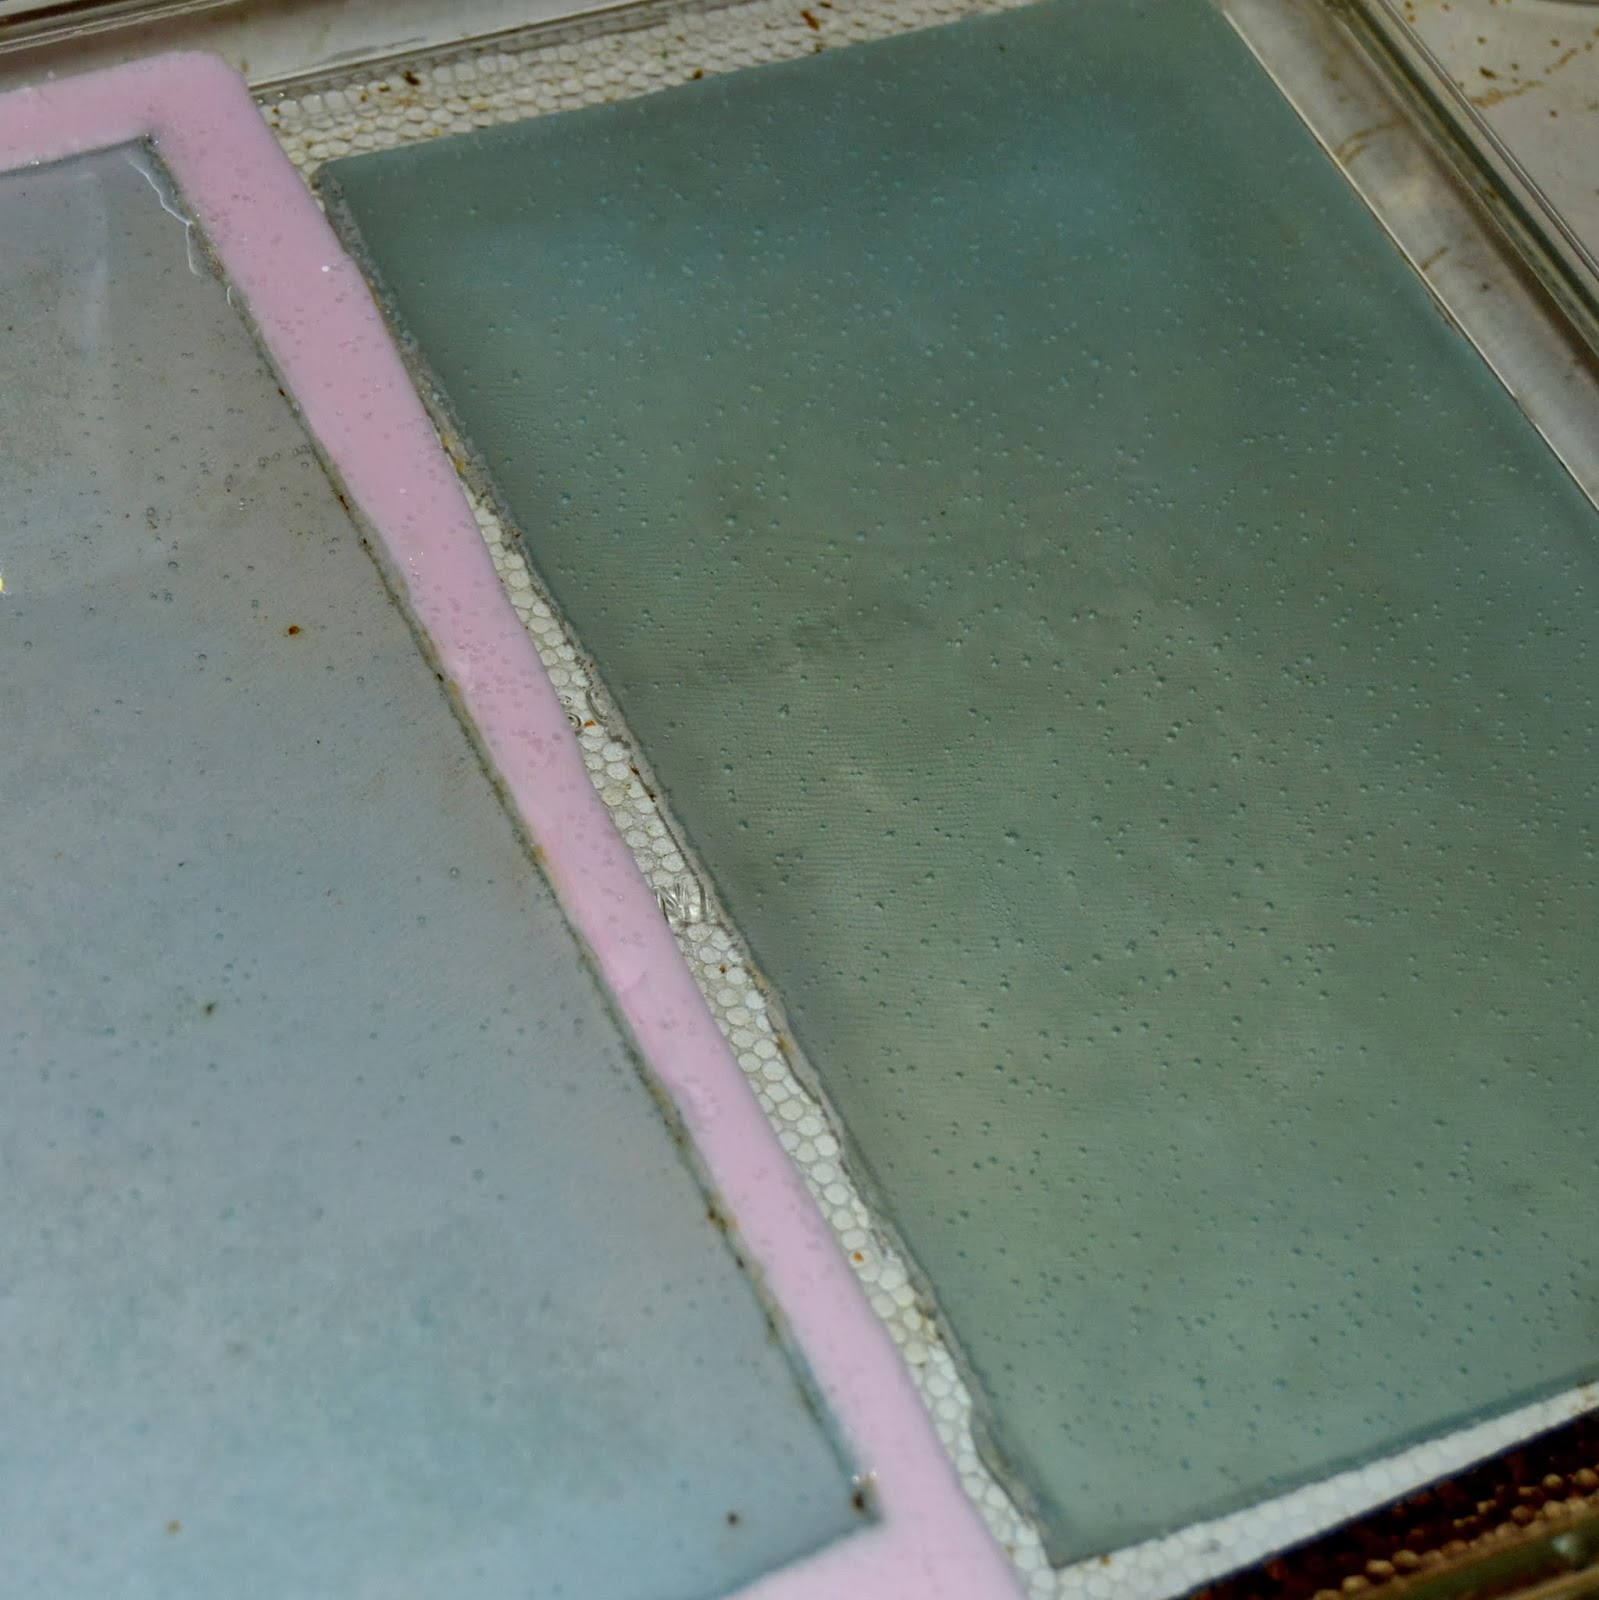
I had ideas that my cover was going to look like ice, so to get an icy look, I used just a DOT of Blue Alumilite Dye in my Amazing Clear Cast Resin before I poured it into the mold. I used a toothpick, dipped into the tip of the dye bottle, and used that dye to tint the Clear Cast Resin. Here's a view of the resin and mold mid removal once everything had cured.
I got busy decorating the cover of my art journal using glitter on the edges, and pieces of ephemera all around on it. My word for the year is FOCUS... so I used the clear surface of the journal to add dimension by putting ephemera in layers on top AND behind the resin, giving the eye LOTS of places to focus! (What can I say... it's the details, people. Details like that make me REALLY happy.) I used some acrylic paints and wiped some of it off to draw out the texture of the original book, and help the embossed part of the cover show well. It was tricky to photograph it! (check out the reflection of the sun off the glitter at the top of the pic!)

In keeping with the Kitchy feel of the 30's and 40's from the original book, I used some old Blue Chip and True Value stamps, some vintage pom pom trim, crepe paper, seam binding ribbon and measuring tape Washi.


I used ephemera from Gauche Alchemy to create pages to fill the inside of my journal! I also used some punchinella from the store to stencil on some of my pages, as well as on the cover. You can GO HERE to see more of those pages!

So, even though this project had a bit of trail and error in it, I managed to get a finished piece that I LOVE, and could make more of!! I'm using this journal for my year long art journal and photography project THE PRECINCT. You can see how I'll be using it in the prompts HERE!

What unique and funky items have you dreamed
of using Amazing Crafting Products to create?
What are you waiting for!?
of using Amazing Crafting Products to create?
What are you waiting for!?
Please share your projects in the comments below! If you create something inspired by my idea, please leave a comment with a link here, so I can come and visit to see! I would love for you to visit me at my "house" too!! Thank you so much for reading!! ~rachel
...........................................
Don't miss a single post!
Please subscribe to our blog via Networked Blogs,
bloglovin' or email on the right side bar:
Twitter at @AmazingCrafting | Facebook at AmazingMoldPutty | YouTube at AmazingMoldPutty

Rachel - this is truly AMAZING! I love the translucency of the vintage book cover showing through bits of ephemera. Totally unique and stunning :)
ReplyDelete