
Hello Fellow Artists! It's Lara here with a project I've been dreaming to make for some time – too long in fact! But finally I have managed to make it all work... and am so thrilled to share it with you all!
Who wants to make some stained glass?!
I have actually completed a version of this a while ago, but was mighty unsuccessful in the end. So I needed to rethink my strategy for the second round and apparently, the time to think paid off! We have amazing faux Stained Glass!

To start this project off... and in my usual fashion these days, I wanted to find a way to reuse a frame that I had acquired. So I cleaned the frame and got some plexiglass for the "glass". I glued this into the frame itself so that I could call it a "window" of sorts!

I used a relief paint by Pebeo that was the colour of lead, so it looked just like I had leaded it myself. I actually did a couple of layers of it, so I used a lot. My first go round, I had all the resin colours bleed together – so this time I made sure I was slow and deliberate and that there would be no holes whatsoever. To make this pattern, I printed a picture of a brick wall with a pattern I liked, placed behind the glass, and just followed it with the lead!
I left this to dry, well truthfully... for a long time! But I would no matter what, for at least a week, just to be safe.
Next up! The resin!


I mixed up he first batch of Amazing Clear Cast Resin using Alumilite dyes, different shades of blue and purple and even added some sparkle to the resin with Alumilite Pearlescent Powder.

Using a popscicle stick, I slowly added resin to each of the squares, focusing on one colour at a time.


You can use the stick to push the resin up to the edges
of each square, which helps prevent overpouring.
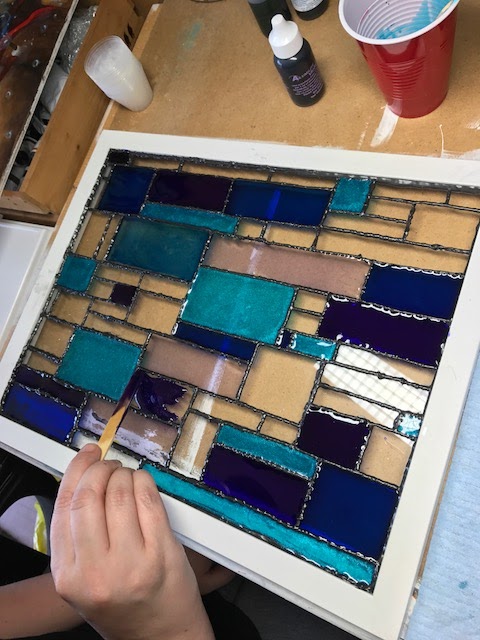
And I took my time. Which in the end produced a great piece, though it meant that my resin started to cure in the cups I mixed them in. I was able to get the pour done, but next time, I would only mix and apply one colour at a time.

Which is exactly what I did for the Alumilite Silver Metallic Powder and the clear pearlescent resin I added later to complete the piece. I covered it up and let it cure overnight.

Add hanging hardware and ribbon and it now hangs lovely in our window!
I couldn't be happier with it! Can't wait to add different colours to the collection!
What type of stained glass would you make?
Hope you enjoyed this project, I have another big one coming up soon!
Check out my website at www.larahjorthoy.com and YourToyCreations.etsy.com. You can follow my day to day creations on Facebook and Instagram, look for YourToy Creations!
• • • • • • • • • • • • • •
Don't forget to subscribe to our blog on the right side bar:
Twitter at AmazingCasting | Facebook at AmazingMoldPutty | YouTube at AmazingMoldPutty

No comments:
Post a Comment